Why You Should Swap Your Basic Metal Hardware for Brass Knobs

Imagine walking into a kitchen that looks brand new, yet the cabinets are actually a decade old. The counters are standard laminate, and the backsplash is simple subway tile. The secret isn't a full renovation; it is the way the light hits the tiny, polished brass pulls every time a drawer is opened. Swapping out basic, builder-grade metal hardware—like brushed nickel or chrome—for brass knobs or pulls is one of the most cost-effective ways to elevate a room from "standard" to "designed." This post explores why brass is a superior design choice for adding warmth, how to select the right finish, and the technical steps to execute the swap without a professional handyman.
The Visual Impact of Brass vs. Basic Metal
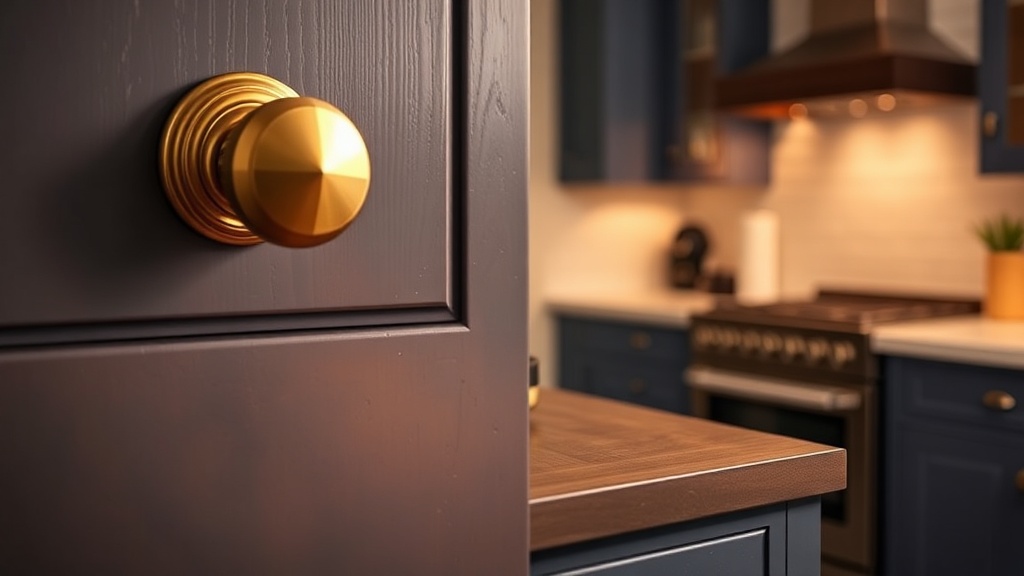
Most modern homes are built with "safe" hardware. Builders often default to brushed nickel or matte black because these finishes are neutral and easy to stock. While these metals are functional, they can often feel cold or industrial. Brass, on the other hand, introduces a sense of warmth and intentionality. Because brass contains yellow and gold undertones, it reflects light in a way that makes a room feel lived-in and cozy rather than sterile.
When you use brass, you are adding a "jewelry" element to your furniture or cabinetry. Just as a gold necklace elevates a plain white t-shirt, brass hardware elevates a plain shaker-style cabinet. This is particularly effective in spaces that feel too "flat." For example, if you have a navy blue kitchen island or a forest green vanity, the high contrast of gold-toned brass creates a high-end, designer look that stainless steel simply cannot achieve.
Warmth and Light Reflection
Standard chrome or nickel hardware tends to absorb or bounce light in a very sharp, clinical way. This can make a kitchen or bathroom feel chilly. Brass acts as a soft reflector. In a room with low natural light, brass hardware can actually help brighten the space by casting a warm, golden glow onto the surrounding surfaces. This is a practical trick for brightening up small powder rooms or dark hallways.
Timelessness vs. Trends
While "trendy" colors come and go, the use of warm metals has been a staple in interior design for centuries. Whether you are looking at traditional English cottages or mid-century modern homes, brass is a constant. By choosing brass, you are investing in a look that won't feel dated in two years. If you are worried about brass looking too "antique," you can opt for modern silhouettes—such as a sleek, cylindrical T-bar pull—to keep the aesthetic contemporary.
Choosing the Right Type of Brass
Not all brass is created equal. Before you head to the hardware store or browse online, you must decide which "vibe" of brass fits your current decor. Choosing the wrong shade can make your hardware look like cheap plastic rather than a premium metal.
- Polished Brass: This is highly reflective and very shiny. It works best in traditional, maximalist, or Hollywood Regency-style homes. Use this if you want your hardware to be a focal point.
- Antique or Unlacquered Brass: This is the gold standard for a "lived-in" look. Unlacquered brass is designed to age and develop a patina over time. As it touches your hands, it will darken and change color, giving your home a sense of history. This is perfect for a rustic or farmhouse aesthetic.
- Brushed or Satin Brass: This is the most versatile option for modern homes. It has a matte, subtle finish that is much more forgiving of fingerprints and water spots. It provides the warmth of gold without the high-glam shine of polished brass.
- Champagne Bronze: This is a softer, more muted version of gold. It is an excellent choice if you want a subtle upgrade that doesn't scream for attention.
When selecting your hardware, always order a single sample first. Hold it up against your cabinet paint or countertop in different lighting conditions—both midday sun and evening lamp light. A brass knob that looks great under bright store LEDs might look much more yellow or orange once it is in your kitchen under warm light.
Technical Execution: The Hardware Swap Process
Replacing hardware is a beginner-level DIY task, but doing it incorrectly can damage your cabinetry or leave you with holes that don't align. Follow these steps to ensure a professional finish.
Step 1: Measure Your Center-to-Center Distance
If you are replacing pulls (the long handles) rather than just knobs, you cannot simply buy any handle you like. You must measure the "center-to-center" distance. This is the distance from the center of one screw hole to the center of the other. Standard sizes are often 3 inches, 3.75 inches, or 5 inches. If you buy a 3-inch pull for a hole that is 3.75 inches apart, you will have a gap that looks unprofessional and requires drilling new holes.
Step 2: Check Your Screw Length
The hardware you buy might come with screws that are too long or too short for your specific doors. Standard kitchen cabinet doors are usually 3/4 of an inch thick, but many furniture pieces or pantry doors are thicker. If your new brass pulls come with 1-inch screws and your door is 1.25 inches thick, the pull won't stay on. I always recommend buying a small pack of assorted stainless steel or brass machine screws from a local hardware store just in case.
Step 3: The Removal and Installation
- Remove old hardware: Use a Phillips head screwdriver to remove the existing hardware. Do not force it; if it feels stuck, there may be dried paint or buildup.
- Clean the surface: Once the old hardware is off, use a damp cloth with a mild degreaser (like a drop of Dawn dish soap) to clean the area. This prevents old grime from being trapped under the new brass hardware.
- Position the new hardware: Place the new knob or pull over the holes. If you are working on a piece of furniture and the holes don't align, you may need to use a drill with a small bit to create a new pilot hole.
- Tighten carefully: Insert the screw through the back of the door/drawer, then through the hardware. Tighten by hand first, then use the screwdriver to finish. Warning: Do not over-tighten. If you overtighten, you can crack the wood or strip the threads, which is a costly mistake.
Budgeting for Your Upgrade
The beauty of this project is that it scales with your budget. You can find high-quality brass hardware at various price points. If you are on a strict budget, look at big-box retailers like Home Depot or Lowe's for basic satin brass pulls. However, if you want something more unique, look at specialized online retailers or even thrift stores.
A pro-tip for the budget-obsessed: check local antique malls or even Facebook Marketplace for vintage brass drawer pulls. Often, you can find high-quality, heavy solid brass hardware for a fraction of the price of new "brass-finished" steel. If the vintage pieces are tarnished, a quick polish with a cloth and some metal cleaner can make them look brand new. This approach is much more sustainable and often results in a more authentic look than buying mass-produced items.
To keep the look cohesive throughout your home, try to stick to a consistent metal theme. If you use brass in the kitchen, consider using similar gold-toned accents in the bathroom or on a sideboard in the living room. This creates a "thread" of design that makes your home feel professionally curated rather than a collection of random pieces. If you are looking to add more cohesive elements to your lighting, you might also consider why you should swap your small table lamps for tall floor lamps to balance the visual weight of your new hardware.
Common Pitfalls to Avoid
While this is an easy project, there are two major mistakes people make. The first is mixing too many different "gold" tones in one room. If you have a bright, shiny polished brass pull next to a dull, dark antique brass pull, it can look messy. Aim for consistency within a single room or a single functional area (like all kitchen cabinets).
The second mistake is ignoring the weight of the hardware. Brass is a heavy metal. If you are installing large, heavy pulls on thin, cheap particle-board drawers, the weight of the pull might eventually cause the screw to pull through the material. Always test the weight of the hardware against the durability of your cabinet doors before committing to a full house-wide installation.