How to Style Your Bookshelves Like a Pro

The Science of the Styled Shelf
Studies in visual psychology suggest that the human brain processes symmetrical and organized patterns much faster than cluttered or chaotic ones, which is why a messy bookshelf can make an entire room feel stressful. A well-styled bookshelf does more than just hold your library; it acts as a focal point that adds texture, color, and personality to a room without requiring a single piece of new furniture. This guide provides a systematic approach to organizing, layering, and decorating your shelves using a mix of practical organization and high-end aesthetic techniques.
Whether you are working with a built-in unit in a living room or a standalone IKEA Billy bookcase, the principles of scale and balance remain the same. You will learn how to use color coordination, varying heights, and "negative space" to create a look that feels curated rather than cluttered. By following these steps, you can transform a utilitarian storage unit into a professional-looking display using items you likely already own or can find for a few dollars at a local thrift store.
Step 1: The Great Purge and Categorization
Before you add a single decorative object, you must clear the shelves entirely. A common mistake is trying to style around existing clutter, which leads to a cramped and unappealing look. Empty every shelf onto a clean surface, such as a dining table or a rug, and sort your items into three distinct categories: books, decorative objects, and "filler" items.
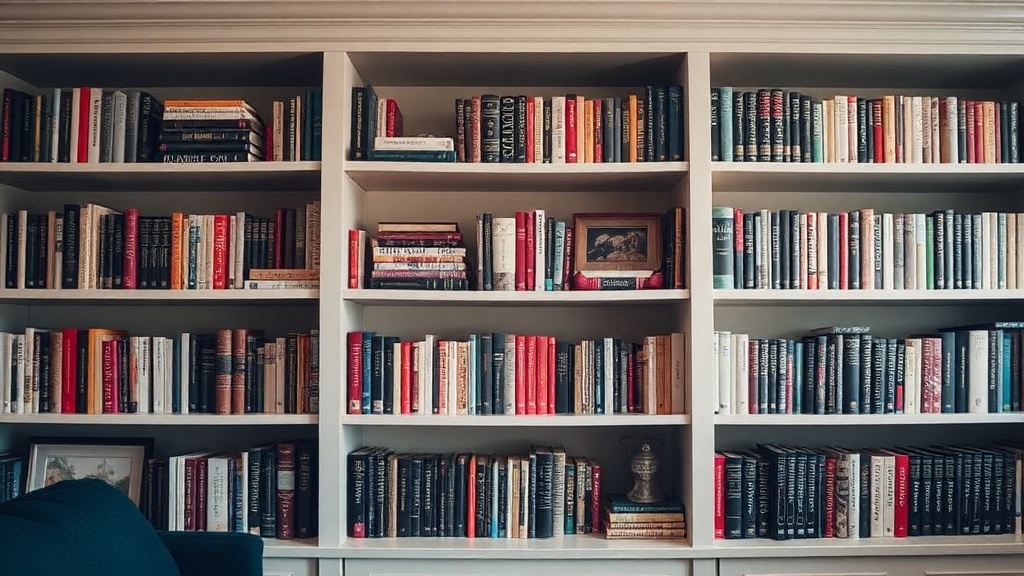
When sorting your books, group them by a specific attribute to create a cohesive foundation. You can choose to group by color (creating a rainbow effect or a monochromatic look), by size (grouping tall hardcovers together), or by subject matter (keeping cookbooks in the kitchen and art books in the living room). If you have books with bright, distracting spines that clash with your room's color palette, consider turning them spine-inward for a neutral, textured look, or use a fabric wrap to create a uniform appearance.
Identify Your Decorative Elements
Once the books are sorted, look at your decorative objects. These should fall into three size tiers:
- Large/Anchor Objects: These are your heavy hitters, such as a large ceramic vase, a heavy stone bookend, or a wooden bowl.
- Medium/Secondary Objects: These include smaller sculptures, framed art, or medium-sized plants.
- Small/Accent Objects: These are tiny details like brass figurines, small crystals, or miniature ceramic animals.
Step 2: Building the Foundation with Books
Books are the architecture of your shelf. Instead of lining them all up vertically like a standard library, use different orientations to create visual interest and varying heights. This technique prevents the shelves from looking flat and boring.
The Vertical Stack: Stand a group of books upright to create a solid block of color or texture. This provides a sturdy "wall" that can support a small object on top, such as a small candle or a tiny brass object.
The Horizontal Stack: Lay 3 to 5 books flat on top of one another. This creates a "pedestal" effect. A horizontal stack is the most effective way to introduce height to a small object. For example, if you have a small wooden bead garland or a tiny ceramic bird, placing it on a stack of three coffee table books instantly elevates its importance in the composition.
The "Z" Pattern: To keep the eye moving, do not place all your vertical books on one side and all your horizontal stacks on the other. Instead, create a "Z" pattern. If you have a vertical stack on the top left shelf, place a horizontal stack on the middle right shelf, and a vertical stack on the bottom left. This creates a sense of movement that guides the viewer's eye across the entire unit.
Step 3: Layering and Depth
A professional-looking shelf has depth, meaning objects are not just placed in a straight line at the very front of the shelf. To achieve a high-end look, you need to layer items from back to front.
Start by placing your largest, heaviest items at the back. This might be a large piece of framed art leaning against the back wall of the shelf, or a large, textured basket. Once the "anchor" is in place, move to the middle ground. This is where you place your medium-sized items, such as a medium-sized plant or a sculptural piece. Finally, add your small accents in the foreground. This layering technique mimics the way professional interior designers stage showrooms, creating a sense of three-dimensional space.
Using Art to Add Dimension
Don't feel limited to standing objects. You can lean framed art or even small mirrors against the back of the shelf. This adds a layer of sophistication and can even help reflect light into darker corners of the room. If you have small pieces of art that feel lost, you can use thrifted picture frames to create a gallery wall effect directly on your shelving units, making the shelf feel more like an integrated part of your wall decor.
Step 4: Incorporating Texture and Life
A shelf filled only with hard surfaces—like books, glass, and ceramics—can feel cold and sterile. To make the space feel "lived-in" and inviting, you must introduce organic textures and living elements.
Greenery: Plants are the easiest way to add life to a bookshelf. Use trailing plants like Pothos or String of Pearls on higher shelves so the vines can drape down over the edges. This softens the hard lines of the shelving. If you don't have a green thumb, high-quality faux greenery or even dried botanicals like eucalyptus work beautifully to add a natural element.
Textiles and Natural Materials: Incorporate items made from wood, woven seagrass, or linen. A small woven basket can hide unsightly items like remote controls or chargers, while a wooden bowl adds warmth to a white or metal shelf. These natural textures break up the monotony of smooth surfaces and add a layer of "cozy" to the design.
Step 5: Lighting and Final Adjustments
Lighting is the most overlooked aspect of shelf styling. A dark shelf can look like a black hole in a room, regardless of how well it is styled. Adding light creates highlights and shadows that emphasize the shapes of your objects.
If you have a bookshelf with built-in lighting, ensure you are using the right bulb temperature. Many people make the mistake of using stark, blue-toned light which can make a home feel clinical. Instead, swap your basic white light bulbs for warm tones to create a soft, inviting glow. If you don't have built-in lighting, you can use battery-operated LED puck lights or even small, cordless "cordless" lamps to illuminate specific sections of the shelf.
The Rule of Three and Negative Space
As you are finishing your styling, remember the "Rule of Three." In design, objects arranged in odd numbers (especially three) are more visually appealing and feel more natural to the human eye than even numbers. If a section feels "off," try grouping three items of varying heights together.
Crucially, do not feel the need to fill every single inch of the shelf. "Negative space"—the empty area around your objects—is vital. If every gap is filled, the shelf will look cluttered and the eye will have nowhere to rest. Leave some breathing room between your groupings to allow the individual pieces to stand out. A shelf that is 70% styled and 30% empty often looks much more expensive and curated than a shelf that is 100% full.
Quick Checklist for Success
- Clear it out: Start with an empty shelf to see the true potential.
- Vary heights: Use a mix of vertical books and horizontal stacks.
- Layer for depth: Place large items in the back and small items in the front.
- Add organic elements: Use plants or natural textures to soften the look.
- Check your lighting: Ensure the shelf is illuminated with warm, inviting light.
- Embrace empty space: Leave gaps so the shelf doesn't look overcrowded.
Steps
- 1
Declutter and Group by Color
- 2
Mix Vertical and Horizontal Book Placement
- 3
Add Decorative Objects and Greenery
- 4
Layer Textures and Heights