$17.53 Thrifted Lamp Glow-Up in 30 Minutes (No Wiring, Beginner-Safe)

$17.53 Thrifted Lamp Glow-Up in 30 Minutes (No Wiring, Beginner-Safe)
My living room lamp was giving "college move-out curb pile" energy, but the ceramic shape was too good to leave behind.
So I grabbed it at Goodwill, fixed the wobble, swapped the shade, and now it looks like one of those $89 "artisan" lamps that sits next to a fake olive tree in every catalog.
No rewiring. No power tools. No sewing.
Total project cost: $17.53
What I bought (what I actually paid in Nashville on March 12, 2026)
- Thrifted ceramic lamp base (Goodwill) - $6.06 (price + tax)
- White drum shade, 11 in (Walmart in-store) - $8.97
- Adhesive felt furniture pads (Dollar Tree) - $1.25
- All-purpose cleaner spray (Dollar Tree) - $1.25
TOTAL: $17.53
If you already own cleaner and felt pads, your out-of-pocket is basically the lamp + shade.
Why this works
- A good lamp shape matters more than a perfect finish.
- The shade does most of the visual heavy lifting.
- Felt pads fix the wobble that makes thrift lamps look cheap.
My unpopular opinion: a slightly imperfect thrifted lamp looks better than a perfectly sterile big-box lamp.
Step-by-step (30 minutes, beginner-friendly)
Unplug and inspect (2 minutes).
Check cord condition first. If the cord is cracked, sticky, or fraying, skip this lamp.
Deep clean the base (8 minutes).
Spray cleaner on a cloth (not directly into sockets), wipe the whole base, then dry it fully.
Fix the wobble (5 minutes).
Flip the lamp over and add felt pads to the uneven points until it sits flat.
Swap the shade (5 minutes).
Remove the old shade and install the white drum shade. Keep the new shade proportional to the base height.
Style test in place (10 minutes).
Set it on a stack of books or a tray so it looks intentional, not random.
Timing + difficulty
- Hands-on time: 30 minutes
- Drying time: none (just let moisture evaporate before plugging in)
- Difficulty: beginner
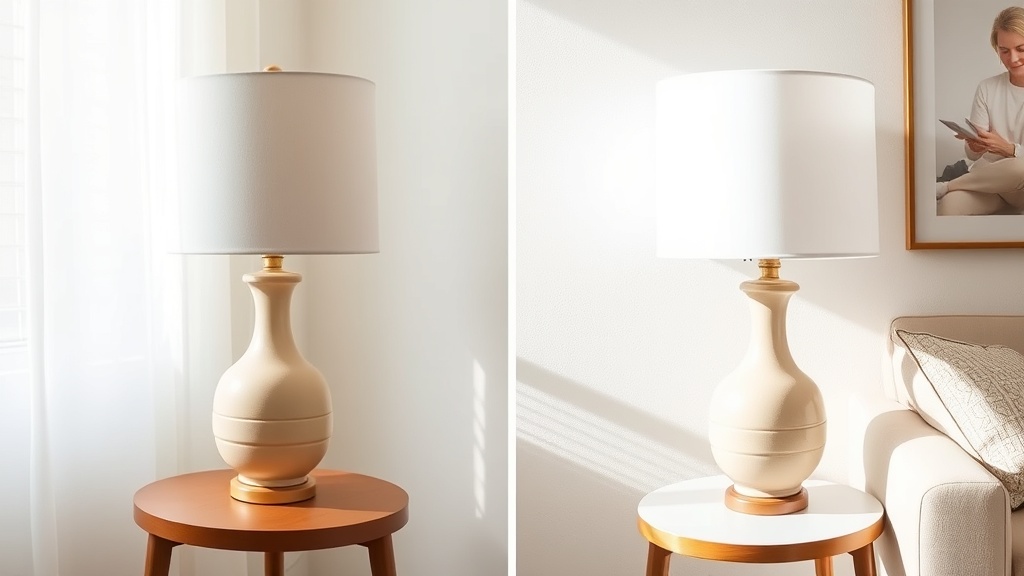
Before vs. after
Before: dingy beige shade, slight wobble, "landlord left this behind" vibe.
After: clean ceramic base, crisp white drum shade, stable on the table, looks custom.
Jae's exact quote: "Wait... that was under twenty bucks?"
Yes. Yes it was.
What I'd do differently next time
- Bring a lightbulb to the thrift store so I can test brightness tone on the spot.
- Check finial threading before checkout (I got lucky this time).
- Buy two matching lamps when I find a good shape, because singles disappear fast.
Full budget breakdown
| Item | Store | Cost |
|---|---|---|
| Thrifted ceramic lamp base | Goodwill | $6.06 |
| White drum shade (11 in) | Walmart | $8.97 |
| Adhesive felt pads | Dollar Tree | $1.25 |
| All-purpose cleaner | Dollar Tree | $1.25 |
| TOTAL PROJECT COST | $17.53 |
FAQ
Is this renter-friendly?
Yes. You are not drilling, patching, or modifying walls.
Do I need to rewire anything?
No, not for this tutorial. If your lamp has wiring issues, skip it and thrift another base.
Can I spray-paint the base too?
You can, but that adds cost and drying time. This version is the fastest low-cost win.
What's the fastest way to make it look expensive?
Shade swap first. Always. The shade is the shortcut.
If you try this, send me your before-and-after. Thrift lamp rescues are one of my favorite "looks expensive, costs lunch money" projects.